


Few things are as stressful as accessing essential files on a computer that suddenly died. The fear of losing everything can be overwhelming, whether it is a work project, personal photos, or vital documents. Fortunately, a dead computer does not always mean the data is lost forever. In many cases, recovering and transferring files safely to an external hard drive is possible.
Following the right steps and using the proper tools can often retrieve valuable data even from a seemingly unresponsive machine. Follow our guide to leanrn everything you need to know on how to transfer data from a dead computer to an external hard drive, ensuring the highest chance of success.
Step 1: Assess The Situation
Before attempting to retrieve your data, it is important to understand what caused your computer to fail. Not every malfunction is the same, and identifying the root cause can help you choose the safest and most effective recovery method.
Signs of a Hardware Failure:
- The computer does not power on at all.
- You hear unusual clicking, grinding, or beeping noises.
- The screen remains black even though the lights are on.
- The device overheats quickly or smells of burning components.
Signs of a Software or Operating System Failure:
- The computer powers on but fails to boot into Windows, macOS, or Linux.
- You see error messages such as "Operating System Not Found" or "Boot Device Missing."
- The machine gets stuck in a boot loop or crashes during startup.
The internal drive may still be intact if the issue is hardware-related, particularly a failed motherboard or power supply. In contrast, if the hard drive itself has failed, the recovery process becomes more complex and risky, in those cases we recommend reaching out to a professional data recovery company.
Step 2: Prepare Your Tools
Once you have assessed the situation and determined that your storage drive might still be functional, it is time to gather the necessary tools. Having the right equipment ready ensures a smoother and safer transfer process.
Essential Tools You Will Need:
- External Hard Drive. Choose a drive with enough capacity to store all the files you intend to recover.
- Working Computer. You will need access to another operational computer to read and transfer the data.
- SATA-to-USB Adapter, Docking Station, or External Enclosure. These devices allow you to connect an internal hard drive externally via USB.
- Data Recovery Software. If some files are corrupted or the drive is partially damaged, reliable recovery software can help you access lost files.
Additional Items for Safety:
- Anti-static Wrist Strap: Prevents static electricity from damaging sensitive hardware.
- Small Screwdriver Set: Necessary for opening the computer case if you need to remove the drive.
- Cable Management Supplies: These are useful for keeping connections tidy and secure during transfer.
Note: Use only high-quality adapters and cables. Cheap or faulty connectors can cause interruptions during the transfer process, risking further data loss.
Having everything in place before you begin saves time and minimises handling, which is critical when dealing with potentially fragile hardware.
Step 3: Remove the Storage Drive
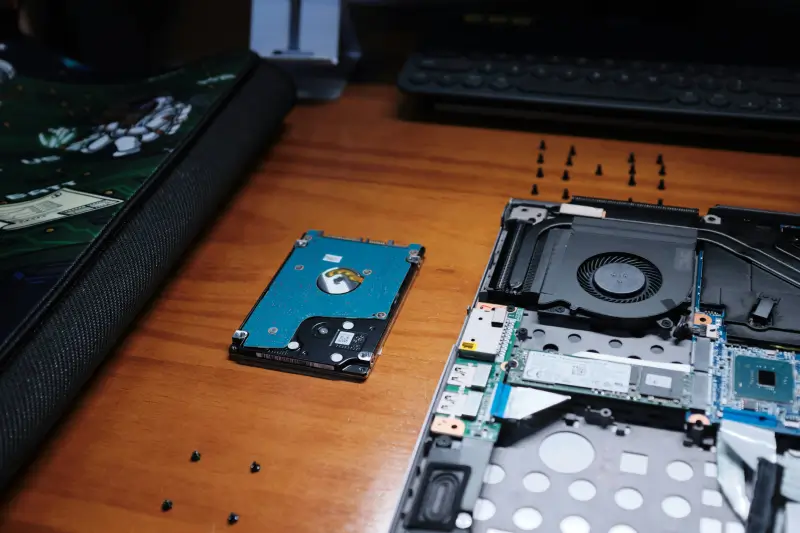
If your dead computer cannot be powered on or accessed externally, you may need to remove the internal hard drive to retrieve your data physically. This step must be performed carefully to avoid damaging the drive.
How to Remove the Drive from a Desktop
- Power Down and Unplug: Disconnect the computer from all power sources.
- Ground Yourself: Use an anti-static wrist strap or touch a grounded metal object to discharge static electricity.
- Open the Case: Use a screwdriver to remove the computer's side panel.
- Locate the Drive: Find the hard drive, typically secured in a metal bay.
- Disconnect Cables: Gently unplug the SATA data and power cables.
- Remove the Drive: Unscrew and carefully slide the drive out of its bay.
How to Remove the Drive from a Laptop
- Power Down and Unplug: Remove the battery if possible.
- Access the Drive Bay: Consult the laptop's manual to locate the drive bay, which is often accessible through a small panel on the underside.
- Unscrew the Panel: Remove the screws and lift the panel to reveal the hard drive.
- Disconnect and Remove the Drive: Gently disconnect the drive and lift it out.
Safety Tips:
- Handle the drive by its edges, avoiding any contact with exposed circuitry.
- Place the removed drive on a clean, non-conductive surface.
Important: If you are uncomfortable opening your device, it is safer to seek professional help. Mishandling can cause physical damage that makes recovery far more difficult and expensive.
Step 4: Connect the Drive to a Working Computer
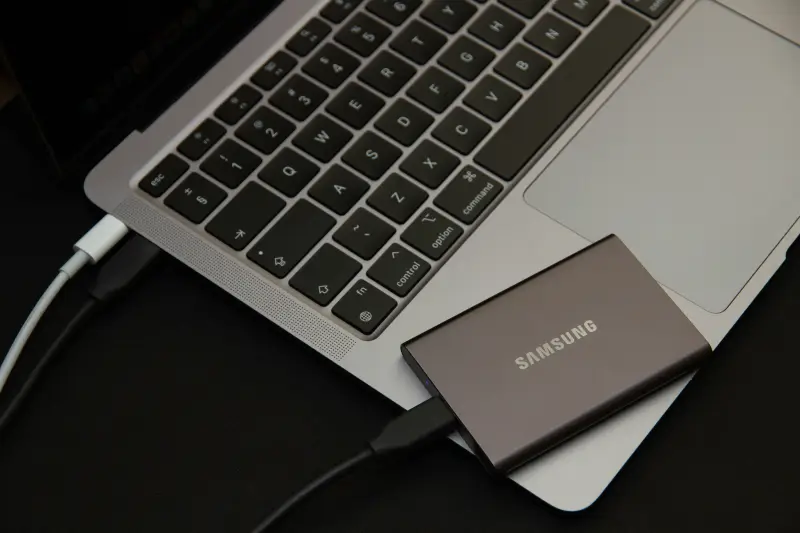
Once you have safely removed the storage drive, the next step is to connect it to a working computer. This process allows you to access the files as if the drive were an external device.
How to Connect the Drive
- Use a SATA-to-USB Adapter, Docking Station, or External Enclosure:
- Plug the internal drive into the SATA port of the adapter or docking station.
- Connect the adapter’s USB cable to a working computer.
- Power On:
- Some docking stations and enclosures require external power. Ensure the drive is adequately powered before connecting it to the computer.
What to Expect
- If the drive is still healthy, it should appear automatically in File Explorer for Windows users or Finder for Mac users.
- You may need to wait a few moments while the operating system installs necessary drivers.
Troubleshooting Tips
Drive Not Showing Up?
- Try using a different USB port or cable.
- Check Disk Management (Windows) or Disk Utility (Mac) to see if the drive is detected but not mounted.
- Avoid forcing any reformatting prompts because this could overwrite your data.
Caution: If the drive makes clicking sounds, spins irregularly, or is not recognised even after basic troubleshooting, disconnect it immediately. These are signs of deeper hardware failure; continued attempts could worsen the damage.
Step 5: Transfer the Data
Once the working computer connects and recognises the storage drive, you can transfer your files to an external hard drive. This stage requires a careful, methodical approach to prevent critical data loss.
Best Practices for Transferring Data
- Prioritise Important Files. Start by copying essential files first.
- Copy, Don’t Move. Always copy files instead of moving them.
- Use a Structured Approach. Transfer files folder by folder. Avoid dragging and dropping the entire drive at once.
- Save to a Reliable External Hard Drive. Ensure the destination drive has plenty of free space and is connected securely throughout the transfer process.
If You Encounter Problems
- File Corruption. If you find corrupted files that cannot be opened or copied, consider using reputable data recovery software to attempt extraction.
- Slow Transfer Speeds. Transfers from a failing drive may be slow. Allow plenty of time and avoid using the computer for other tasks.
- Partial Drive Access. If only parts of the drive are accessible, try to retrieve files from healthy sectors first.
Pro Tip: Keep a backup copy of the recovered files on a second storage device or cloud service.
Call Secure Data Recovery for Professional Help
While recovering data from a dead computer is often possible with the right tools and methods, some situations call for expert intervention. If your hard drive shows signs of physical damage, makes unusual noises, or fails to be recognised despite all troubleshooting efforts, it is crucial to stop further attempts immediately.
Working with a failing drive can worsen the problem and permanently erase valuable files. Professional data recovery services have the expertise, specialised tools, and cleanroom environments necessary to handle even the most complex failures. Secure Data Recovery offers specialised, comprehensive solutions tailored precisely to your needs.
Our team ensures a seamless and convenient recovery process for a hassle-free, high-performance data security solution. Contact us today at 0800 102 6925 to speak with our specialists and begin the secure recovery of your data.


